I’ve been a longtime fan of VirtualBox, but recently I decided to give VMware a shot. As it turns out, I really like it. The downside is that at the retail price of $249 — the program is pretty darn expensive. That aside, I spent the last couple days setting up virtual environments with VMware Workstation 9. VMware has really streamlined the process of creating new Virtual Machines (VMs) and below I’ve written out a quick walkthrough that details the experience. Requirements There’s a few things that you should ideally have before trying to setup a Virtual Machine:
Operating System .ISO file or install disk (Windows, Linux, or Mac OS X)A CPU that supports Virtualization. If you’re not sure, check out this article. (Recommended) A 2nd hard drive to store the VM on to prevent I/O constraints
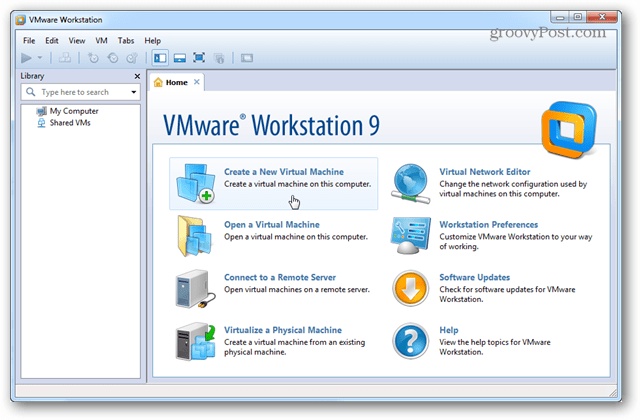
When you first open VMware Workstation, the button to set up a New Virtual Machine couldn’t be any easier to find. It’s on the top-left of the main window. Pressing this button is what you need to do to get started.
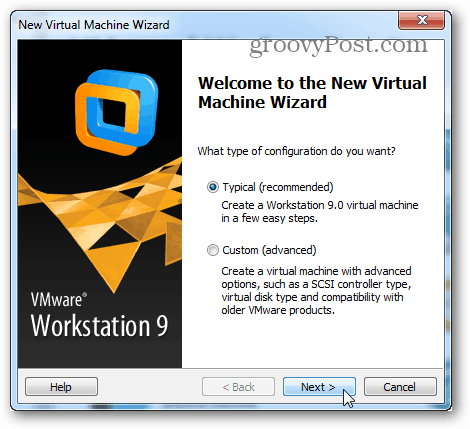
The installation wizard will open up and prompt you to choose between one of two different installation configurations. For most intents and purposes, the Typical installation will do just fine.
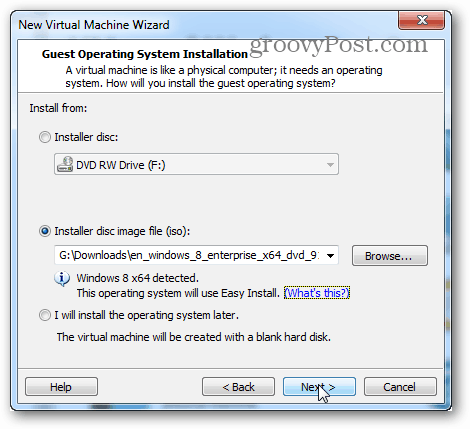
Now it’s already time to select the installation .ISO file or disk from the DVD drive. Note that most recent versions of Windows and other operating systems support VMware’s Easy Install. All this means it that the VM setup wizard will ask some basic questions about the OS is loaded before it starts, and then make the OS install completely unattended.
This next step is part of the Easy Install. The information entered here will be used to make the install of the operating system automated. If you’re setting up a Windows VM it may be necessary the product key or else unattended installation may not be completely automated.
Next up is an important step. VMware will ask for a name to give the virtual machine, and then it will ask where to store the virtual machine’s data files and VHD (virtual hard drive).
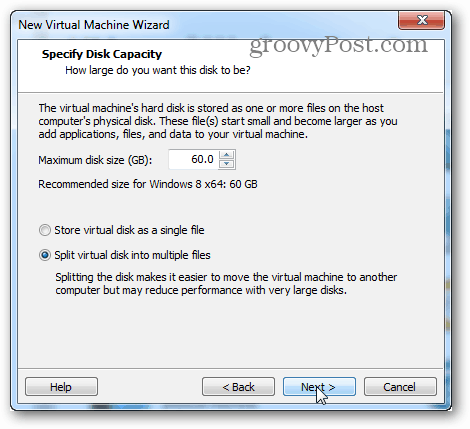
Now choose how big the maximum size of the virtual hard drive, and what type of file system the drive will use. Keep in mind that even if you leave the maximum size at the default of 60GB, the virtual disk won’t actually be that size until the VM literally contains that much data.
SplitA split virtual disk is designed with maximum compatibility in mind. It will work on external and internal drives from all formatting types, including FAT. This is the primary reason that Split is selected by default in the VM creation wizard.Single FileA single file drive will perform better with large virtual disks (200GB+). However, it will run into compatibility with some physical hard drives (usually external). A Single File virtual disk should only be used on physical drives using the NTFS or exFAT filesystem.
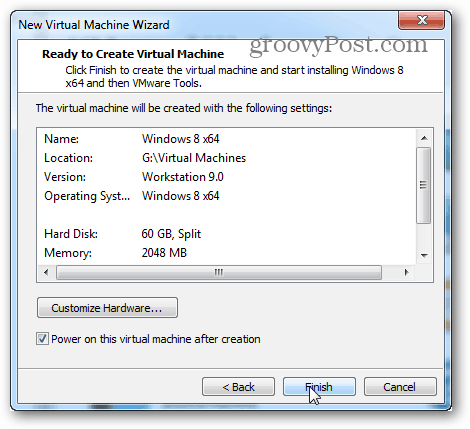
Next up is the VM summary and the Finish button. Once Finish is clicked the installation will start. There is a Customize Hardware… button here as well, but that can be changed later if necessary. Time to get the show on the road!
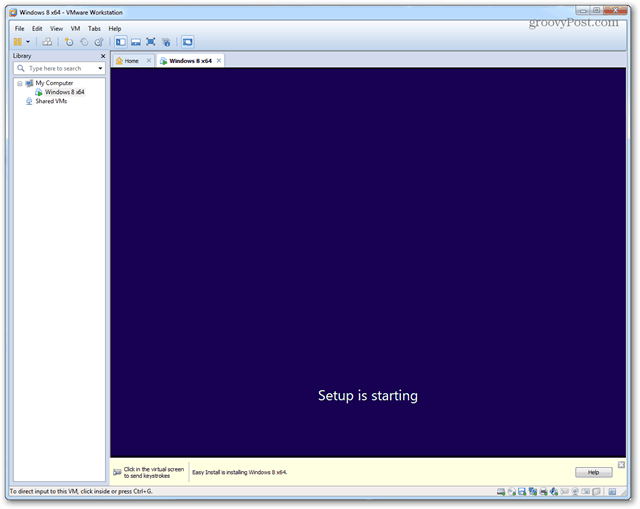
At this point you’re brought back to the Workstation window. In the main screen it will show the OS being installed. In my case I was installing Windows 8, and I just minimized it and did something else while I waited for it to finish.
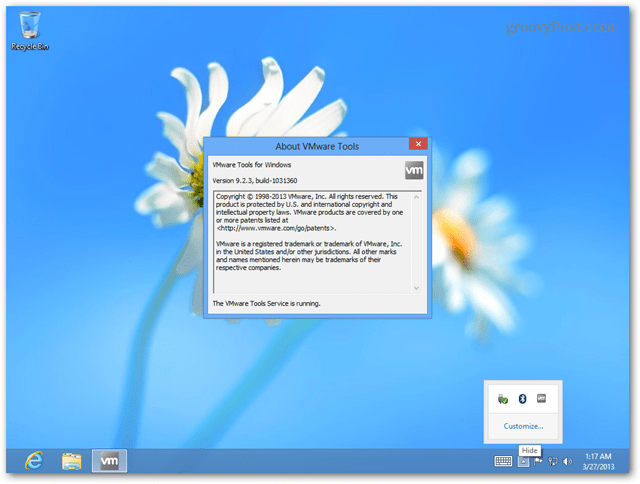
Once the install is done the OS on the virtual machine should be loaded and VMware Tools should automatically have been installed. Groovy! Everything works!
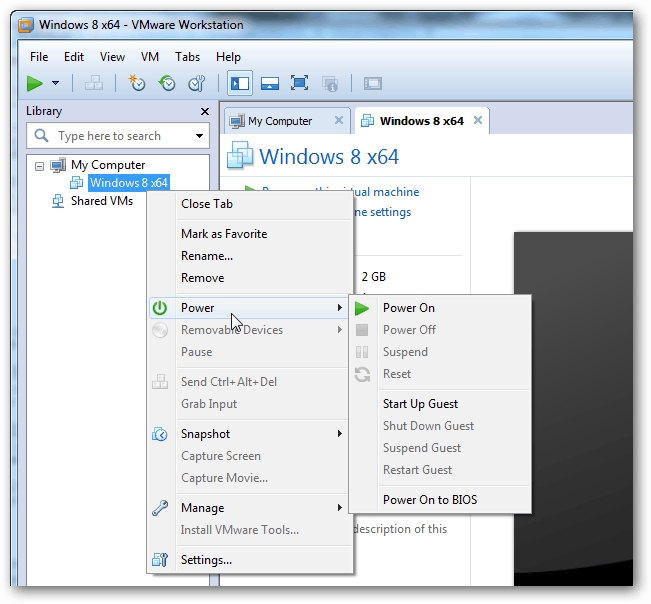
Shutdown, sleep, and other commands can be directly sent o the VM via the Workstation interface. Just right-click on the VM name to issue whatever you need it to do.
In the Settings window for the particular VM you can adjust what hardware the VM is allowed to use and set different RAM, CPU, and drive allocation.
That’s all there is to setting up a VM in VMware Workstation 9. If you have any questions or comments, drop them below! Some footnotes/thoughts: VMware also has their free way to much of this fun stuff. Despite the name, VMware Player, it does allow you can create VMs, which can work out well for many users who don’t care as much about developer-centric workstation-only features (like snapshots): http://www.vmware.com/product/player I wrote a bit more about those a while back, at: http://www.tinkertry.com/freevmwareplayercancreatevms http://www.tinkertry.com/vmware-workstation-9-released-august-23-2012-fine-free-version-called-vmware-player-5-0 Using VMware for virtual machines (Workstation or Player) also makes it a bit easier to import and export to and from the full Hypervisor called VMware ESXi, that many IT folks are accustomed to using at work. Comment Name * Email *
Δ Save my name and email and send me emails as new comments are made to this post.


![]()
